
Substantively reviewed and updated: August 28, 2026 · Evidence and links checked August 28, 2026
Direct answer
Put shapewear on by distributing the fabric in small sections, aligning panels and openings, and testing the complete outfit while sitting and moving. Follow the product’s own instructions: many pull-on garments are gathered and stepped into, while hook, zipper or strap designs require a different sequence. Do not yank one waistband or strap, roll the garment into a tight band, or size down to make it feel stronger.
- Use the garment’s route.
Pull-on, hook, zipper and bodysuit constructions do not share one universal dressing method. - Align before tightening.
Place gusset, panels, seams, leg openings and straps before the final fit check. - Test the whole outfit.
Sitting and movement reveal rolling, stacked edges and access problems that standing misses.
Quick FAQ
How do you put on shapewear correctly?
Follow the product instructions, gather a pull-on garment, step in if designed for it, position the lower section and ease fabric upward in small sections. Align seams, panels and openings before adjusting the top edge or straps.
Should you wear underwear under shapewear?
There is no universal rule. Follow the garment label and product design, then consider gusset construction, bathroom access, hygiene preference, seams and the outer outfit.
Why does shapewear roll down or roll up?
Rolling can reflect a size mismatch, incompatible torso or thigh length, poor placement, a stacked waistband or the wrong construction for the outfit. Stronger compression is not a guaranteed fix.
How do you know shapewear fits correctly?
You should be able to breathe, sit, walk and bend normally without pain, numbness, a hard cutting edge or persistent irritation. Coverage and seams should stay aligned in the actual outfit.
Before dressing: read the garment instead of guessing
Shapewear is a category, not one construction. A seamless pull-on short, a front-hook bodysuit and an adjustable-strap bodysuit use different entry routes and contain different stress points. First check the product page and the sewn-in or attached instructions. Identify the top and bottom, front and back, gusset, closure, compression panels, adjustable straps and any open or zipper access.
The U.S. FTC Care Labeling Rule requires manufacturers and importers of covered textile apparel to attach care instructions supported by a reasonable basis. Those care directions matter to fit because excessive heat, unsuitable washing or mishandling can damage elastic recovery. The FTC Textile Fiber Rule governs fiber-content disclosures. Fiber names can help describe a garment, but percentages alone do not reveal panel engineering, finished measurements or pressure. If repeated wear or care has changed the fit or recovery, use the shapewear replacement checklist to decide whether to reassess, repair or replace the piece.
Check your current measurements against the exact chart, not a remembered dress size. ISO 8559-2:2017 distinguishes body-dimension size designation from the garment dimensions that a designer sets for style and cut. That distinction explains why two garments marked with the same letter can dress differently.
The six-step dressing sequence
Prepare → gather → position → distribute → align → test
Use only where compatible with the product’s own instructions
Qinelle apparel-handling workflow. It is not a substitute for the product label; closure-based and medically prescribed garments require their own instructions.
- Prepare the space and garment. Use dry hands and skin, remove rings or bracelets that can snag stretch fabric, and make sure the garment is not inside out or twisted.
- Open what is designed to open. Release hooks, zippers or adjustable straps only as intended. Never force a closed path because another garment is pulled on that way.
- Gather pull-on fabric. For a garment designed to be stepped into, gather each leg or the torso section so you are not pulling the entire length from the waistband.
- Position the lower body first. Set the gusset, hip and thigh sections and distribute fabric evenly on both sides.
- Align construction points. Place side seams, control panels, leg openings, underbust edge, straps and closures where the design expects them.
- Test before the occasion. Put on the outer garment, sit, bend, walk, breathe and verify restroom access.
Dressing sequence by garment format
| Format | Sequence focus | Final checks |
|---|---|---|
| High-waist brief | Position gusset and hip before easing the waistband upward | Waist lies flat; leg openings do not cut; outer waistband does not stack painfully |
| Shaping short | Set each leg evenly, then distribute fabric over hip and waist | Thigh hems are level; seated movement does not cause a hard rolled edge |
| Pull-on bodysuit | Position lower body before torso, bust and straps | Torso length is compatible; straps and gusset do not pull |
| Hook-front or zipper garment | Place body and panels before closing gradually according to instructions | No skin is caught; closure lies flat; pressure is not concentrated at its edge |
| Open-bust bodysuit | Align underbust edge and straps before adding the chosen bra | Bra and shapewear do not create stacked pressure or visible lines |
Why shapewear rolls—and the fix that matches the cause
Rolling is not one problem. A top edge can roll because it lands where the torso bends, because the garment is too small, because it is too large to maintain placement, because it was pulled up unevenly or because an outer waistband pushes it downward. A thigh hem can roll because its circumference or length is incompatible with the leg. A bodysuit can create tension at the waist because its torso is too short.
| Problem | Check first | Better experiment |
|---|---|---|
| Top waistband rolls when sitting | Torso bend point, waistband height and outer waistband overlap | Compare a lower edge, a higher edge or connected bodysuit coverage |
| Thigh hem rides upward | Thigh measurement, hem placement and fabric interaction | Compare a shorter brief or a longer short whose edge lands elsewhere |
| Fabric bunches at waist | Whether panels and gusset were positioned before the waistband | Remove and redress in sections; if repeated, compare another torso length |
| Straps dig into shoulders | Adjustment, bust support and torso length | Redistribute support or choose adjustable/open-bust construction |
| Closure becomes painful | Alignment, skin catching and outer-layer pressure | Remove; do not force a tighter setting to flatten the closure |
Use the Qinelle size guide and the product-specific chart. When the measurements are correct but the same edge repeatedly fails, the solution may be architecture. The one-piece versus separates guide helps identify whether connected coverage or modular sizing better suits the outfit.
Underwear under shapewear: decide from construction and use
There is no evidence-based universal rule requiring or forbidding underwear under everyday shapewear. Check the product instructions and gusset. Some shoppers prefer underwear for hygiene or familiarity; others avoid it to reduce visible seams. The practical questions are whether the layers remain dry and comfortable, whether two elastics stack at the same point, and whether bathroom access still works.
Do not treat a gusset opening as permission to ignore care instructions. Follow the garment label, wash after the appropriate use, dry it as directed and inspect elastic, hooks, zippers and seams before redressing. If the garment is postoperative or prescribed, follow the treating team’s directions instead of ordinary fashion-layer advice.
The complete-outfit test catches hidden problems
Four layers of evidence
A pass requires the shapewear and outer garment to work together
Decision rule: a failure in any layer calls for removal, adjustment or a different construction. Standing appearance alone is insufficient.
Walk in the shoes you plan to wear. Sit in a chair similar to the venue or workplace. Reach, bend and climb steps when those movements are part of the day. If the occasion includes a meal, recognize that abdominal comfort can change. Do not use a successful two-minute standing check as a guaranteed all-day result.
Fit and safety boundaries while wearing
Cleveland Clinic says modern flexible shapewear does not permanently relocate organs, but warns that excessively tight garments can irritate skin, compress nerves or aggravate reflux. The correct response to pain, numbness, tingling, breathing difficulty, swelling or persistent irritation is to remove the garment—not to wait for it to stretch.
For a full symptom boundary, read is shapewear safe for everyday wear?. For a fit-based duration decision, use how long can you wear shapewear?. Correct dressing technique cannot turn an incompatible size or construction into a safe fit.
Care affects the next fit
Elastic fibers and bonded or sewn structures can change when exposed to unsuitable heat, bleach, agitation or drying. Follow the exact care label rather than a generic internet recipe. Reshape the garment only as directed and let it dry completely before wear. Inspect for stretched openings, damaged closures, loose seams or rough edges that can change pressure distribution.
The FTC rule does not certify comfort or performance; it establishes a framework for care instructions. Likewise, a fiber label identifies composition but does not prove compression pressure or recovery. The shopper still needs the garment-specific chart, construction details and complete-outfit test.
Three constructions for practicing the workflow
Brief
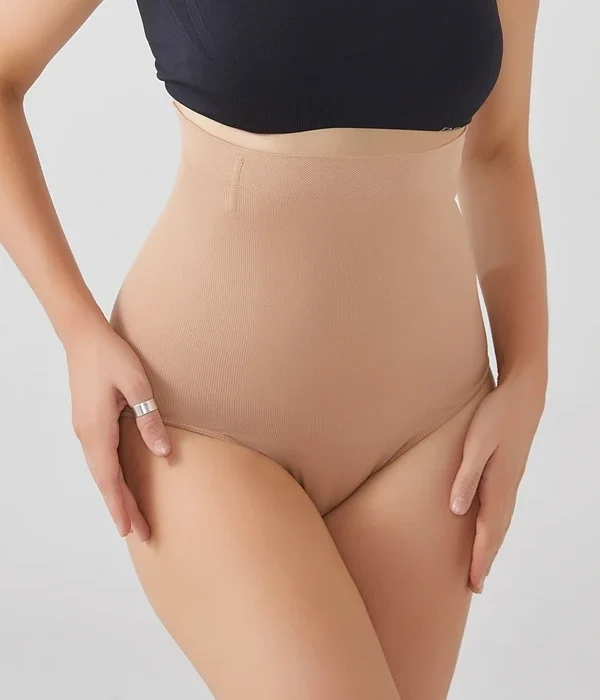
Practice lower-body positioning before the waistband with the High-Waist Tummy-Control Shaping Brief.
Short
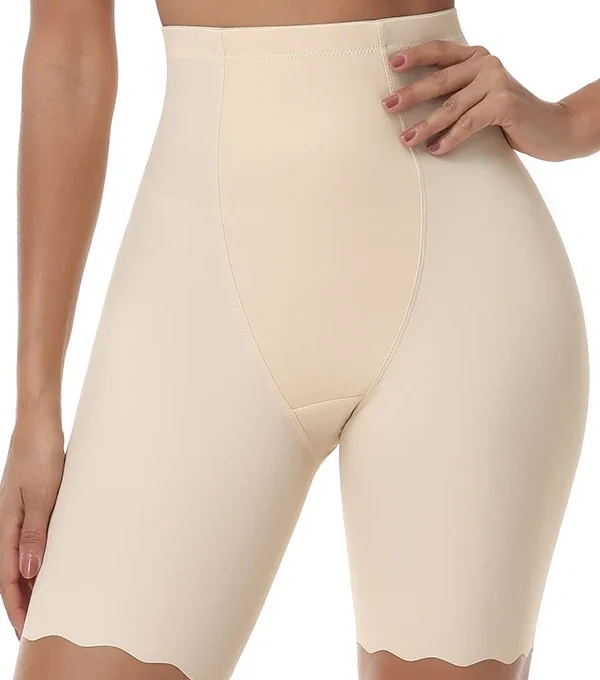
Check that each leg is even before moving upward with the High-Waist Seamless Shaper Shorts.
Bodysuit
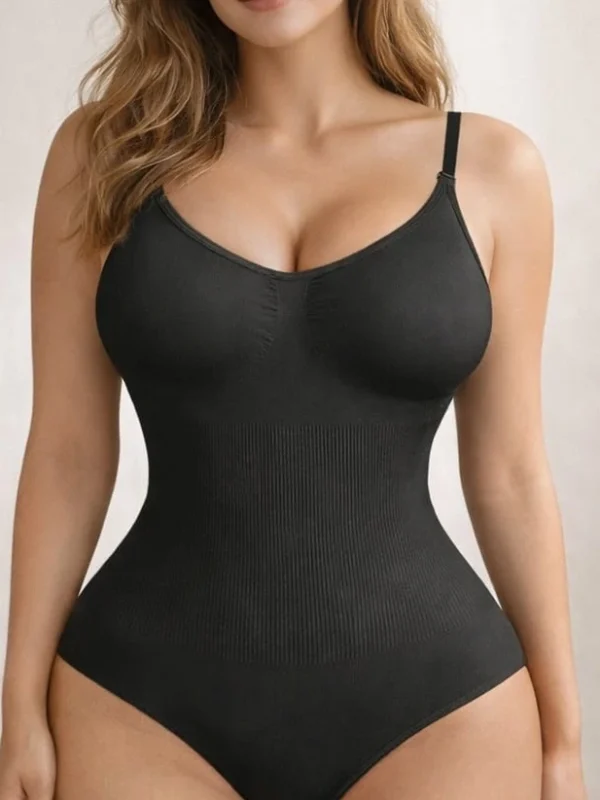
Align lower body, torso and bust in sequence with the Seamless Tummy Control Bodysuit.
Choose first
If the architecture is not decided, start with how to choose shapewear for your body shape and outfit.
Compare current everyday formats
These published, in-stock examples were verified on August 28, 2026. Read the live product instructions and chart; this dressing guide does not replace them.
- Shaper Shorts
High-Waist Seamless Shaper Shorts – Tummy & Thigh
Original price was: $39.00.$29.00Current price is: $29.00.Select options This product has multiple variants. The options may be chosen on the product page - Shaping Briefs & Thongs
High-Waist Tummy-Control Shaping Brief
Original price was: $29.00.$19.00Current price is: $19.00.Select options This product has multiple variants. The options may be chosen on the product page - Shapewear Bodysuits
Seamless Tummy Control Bodysuit for Smooth Everyday Outfits
Original price was: $39.00.$29.00Current price is: $29.00.Select options This product has multiple variants. The options may be chosen on the product page
What this guide supports—and what it cannot
Supported here
- A construction-aware dressing and alignment process
- Troubleshooting rolling by size, placement, proportion and outfit
- Care-label and complete-outfit checks
Not established here
- One universal dressing route for every product
- That stronger tightness or sizing down improves results
- Medical suitability, measured pressure or a universal wear schedule
Sources and evidence notes
- FTC Care Labeling Rule — required apparel-care instructions and reasonable-basis context.
- FTC Textile Fiber Rule — fiber-content and textile disclosure context.
- ISO 8559-2:2017 — size designation based on body dimensions and designer-set garment allowances.
- Cleveland Clinic: A Doctor’s Advice on Wearing Shapewear — correct sizing and skin, nerve and digestive warning signs.
Sources, products and internal links checked August 28, 2026. Editorial method: dressing steps were limited to general apparel handling and explicitly subordinated to product instructions; no product pressure, medical effect or universal wear time was inferred. No clinician review is claimed.