
Substantively reviewed and updated: August 28, 2026
Direct answer
Choose a post-surgery compression garment by mapping the procedure areas, required coverage, pressure-free zones and access needs—then confirm the exact design with the surgeon or healthcare provider. A full-body suit is not automatically better than a smaller garment, and Stage 1, Stage 2 or “firm” labels do not create a universal medical specification.
- Map the body: list every area that should be covered, accessible or pressure-free.
- Compare construction: closures, seams, sleeves, legs, rear panels and gussets can matter as much as size.
- Confirm the plan: only the treating professional should set timing, pressure and wear duration.
Quick FAQ
What is the best post-surgery compression garment?
The best choice is the product whose documented coverage and construction match the treating professional’s instructions and your current measurements.
When is a full-body compression suit appropriate?
Only when connected coverage across multiple areas is requested and the provider approves its seams, closures, pressure distribution and access.
Should I choose Stage 1 or Stage 2?
Ask your provider. Stage labels help compare a retailer’s product groups but do not establish one universal recovery timeline or pressure level.
Should I size down for stronger compression?
No. Use current measurements and the exact product chart. Sizing down can move seams and pressure into the wrong places.
The four-part selection framework
| Part | Write down | Product details to compare |
|---|---|---|
| Coverage | Areas to cover and the upper/lower boundaries | Torso, bust, back, buttock, arm and leg coverage |
| Pressure-free/access areas | Incisions, grafted areas, drains or zones requiring inspection | Openings, panel construction, zipper guards, gusset and rear design |
| Fit specification | Current measurements and any documented support or pressure requirement | Exact size chart, adjustment rows and verified product documentation |
| Wear plan | Start, removal, sleep, showering, change and stop instructions | Ease of dressing, closures, backup garment needs and care label |
Quick comparison by procedure type
| Procedure discussed with the provider | Construction commonly compared | Questions requiring provider confirmation |
|---|---|---|
| Liposuction | Abdominal, lower-body, upper-body or full-body format based on treated zones | Exact treated-area boundaries, seam/closure restrictions and changing fit |
| Tummy tuck or abdominal procedure | Abdominal binder, open-bust bodysuit or connected lower-torso format | Incision, drain and closure access; abdominal pressure and garment edges |
| BBL or fat transfer | Provider-approved rear-panel construction with specified torso/leg coverage | Which grafted zones must stay pressure-free and which seat design is acceptable |
| C-section or postpartum | Binder, brief, shorts or bodysuit when approved | Whether and when a garment is appropriate; incision contact and dressing effort |
| Breast procedure | Front-closing recovery bra or vest in the requested coverage | Band, cup, strap, underarm, incision and front-closure requirements |
| Arm or upper-back procedure | Sleeved top, arm garment or coordinated upper-body set | Sleeve length, underarm seam, torso connection and dressing assistance |
When is a full-body compression suit the right format?
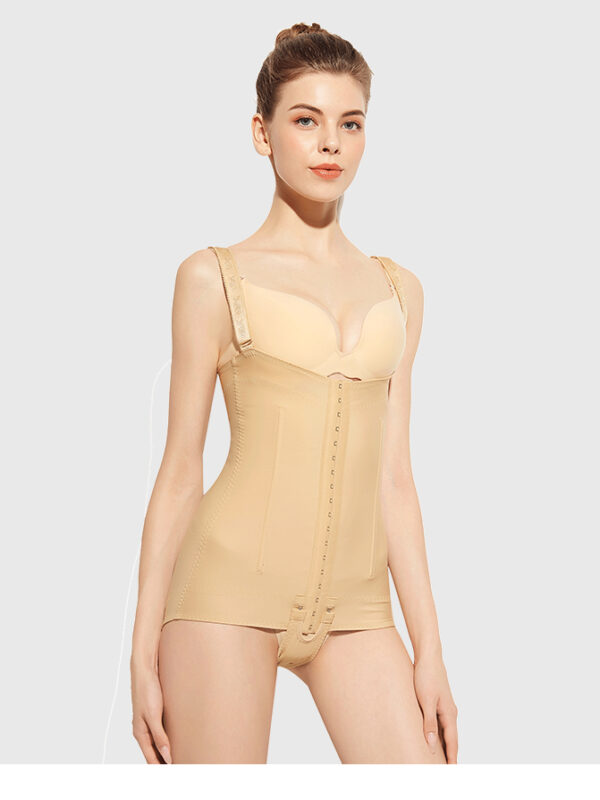
A full-body compression suit connects several coverage zones in one garment. It may be useful to compare when a procedure plan covers multiple areas and the provider wants continuous construction. It can also introduce more fit variables: torso length, bust opening, sleeve and leg length, rear-panel design, gusset, closures and the relationship between upper- and lower-body measurements.
Do not select a full-body suit merely because it sounds more complete. Separate pieces may fit better when upper- and lower-body measurements differ, and a smaller garment may be more appropriate when only one zone requires coverage. Ask whether overlap or a gap between separate pieces is acceptable.
After liposuction: match every treated area
The plan may involve the abdomen, flanks, back, hips, thighs, arms or more than one area. Draw a simple coverage map and compare it with the product photos and description. An edge ending within a treated area or an unapproved seam or closure can make a product unsuitable even when the overall size appears correct.
For the full decision process, read Compression Garments After Liposuction.
After BBL or fat transfer: rear construction needs explicit approval
Do not assume that “BBL-safe,” open-seat or another retail label is sufficient. Ask the surgeon which areas should receive support, which should remain pressure-free and whether the exact rear panel and leg coverage are appropriate. The BBL Recovery guide organizes those construction questions.
After a C-section: begin with incision and mobility questions
A binder and a full bodysuit are not interchangeable. A binder focuses on the abdomen and is easier to adjust; a bodysuit adds connected hip or thigh coverage but may require more pulling, bending and closure access. The provider should determine whether any garment is appropriate and how it may contact the incision area.
See the C-Section Compression Garment Guide for a postpartum-specific checklist.
After breast or arm procedures: upper-body details matter
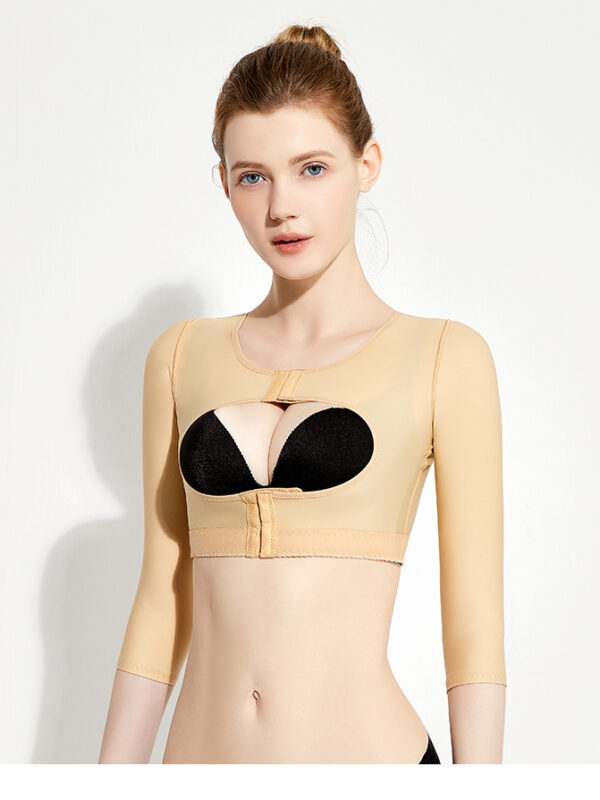
For a bra or vest, compare the lower band, cup or open-bust design, straps, front closure and underarm coverage. For arm procedures, compare sleeve length, sleeve opening, underarm seam and whether the garment connects to a torso section. Only the surgical team can approve contact with incision areas or set the support requirement.
Stage labels and mmHg: read the documentation carefully
Stage 1 and Stage 2 are widely used shopping descriptions, but brands do not necessarily use them identically. Likewise, a garment that feels firm does not prove a measured pressure. Do not assign a number to a Qinelle product unless its current documentation explicitly supplies a verified measurement.
Use the Stage 1 vs Stage 2 guide and support-level guide to understand product language, then compare it with the provider’s written request.
A seven-point product-page check
- Identity: confirm that the product is in Recovery Support, not an everyday styling substitute.
- Coverage: match every upper, lower and side boundary to the written plan.
- Pressure-free areas: compare rear panels, openings and any place the provider says must not receive pressure.
- Measurements: use current body measurements and the chart for the exact product.
- Closures: check hook rows, zippers, guards and whether permitted movement allows you to operate them.
- Access: review gusset, bathroom, wound-inspection and drain-access needs.
- Care and backup: read the care label and ask whether a second approved garment is useful while one is washed and fully dried.
How should a recovery garment fit?
It should sit in the intended position and match the support specification supplied by the provider. More pressure is not automatically better. Do not continue through significant pain, numbness, breathing difficulty, concerning skin color or temperature change, wound interference or another symptom your care instructions identify as urgent.
Coverage examples from the Qinelle catalog
| Coverage need to compare | Example format | Product ID |
|---|---|---|
| Connected multi-zone coverage | Open-bust full-body garment | 8336 |
| Arms plus abdomen | Separate upper-body and abdominal set | 8347 |
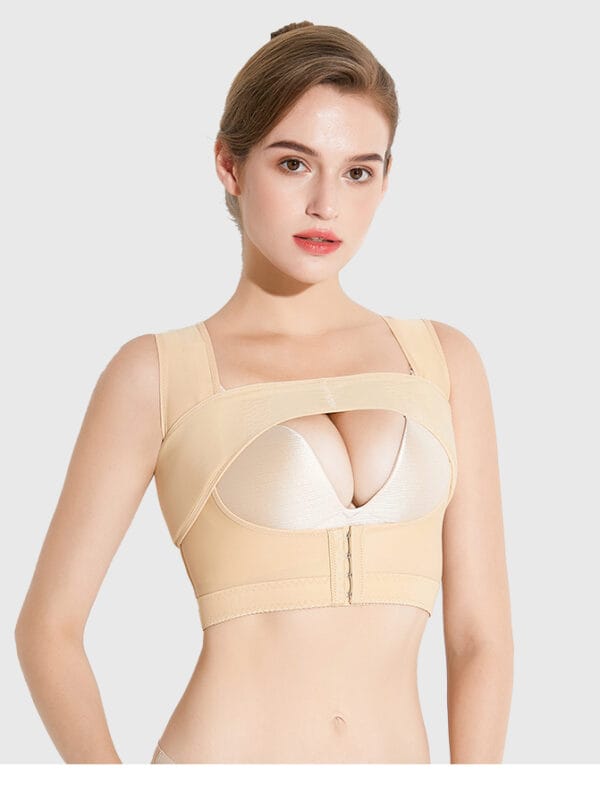
| Breast/upper torso | Front-hook open-bust bra vest | 8424 |
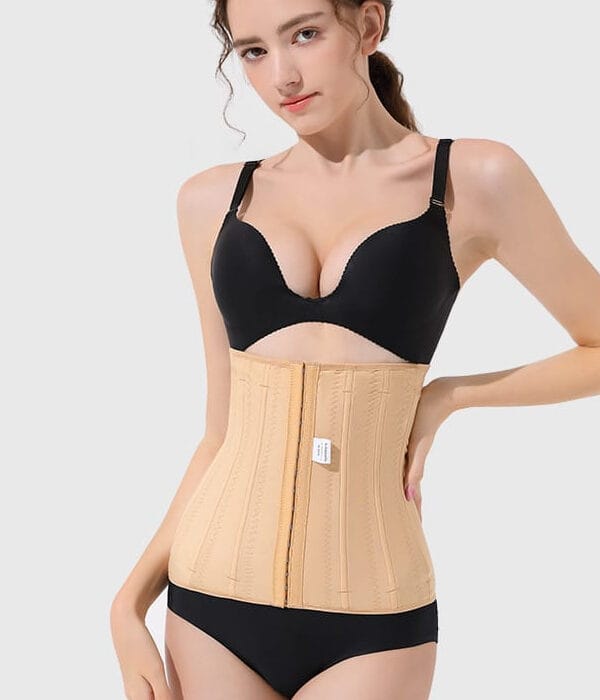
| Abdomen only | High-waist abdominal belt | 8635 |
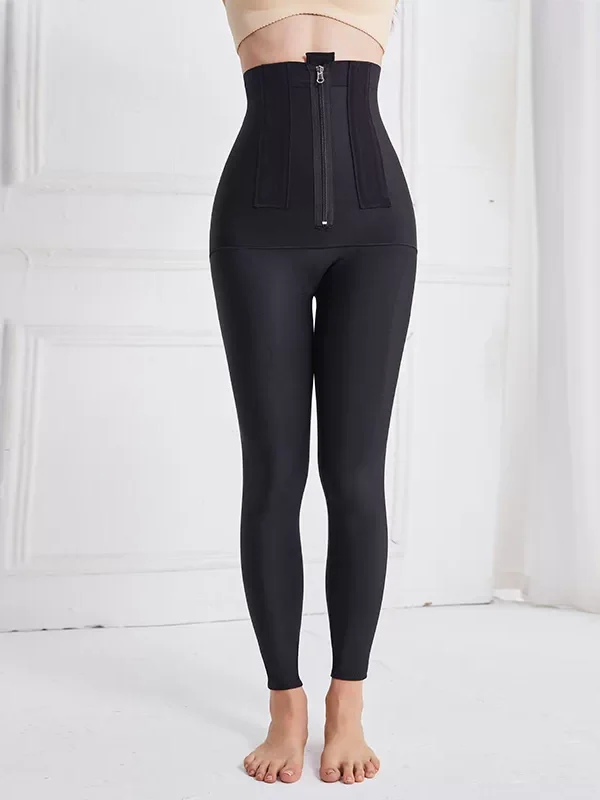
| Abdomen through full leg | Front-zip recovery leggings | 8734 |
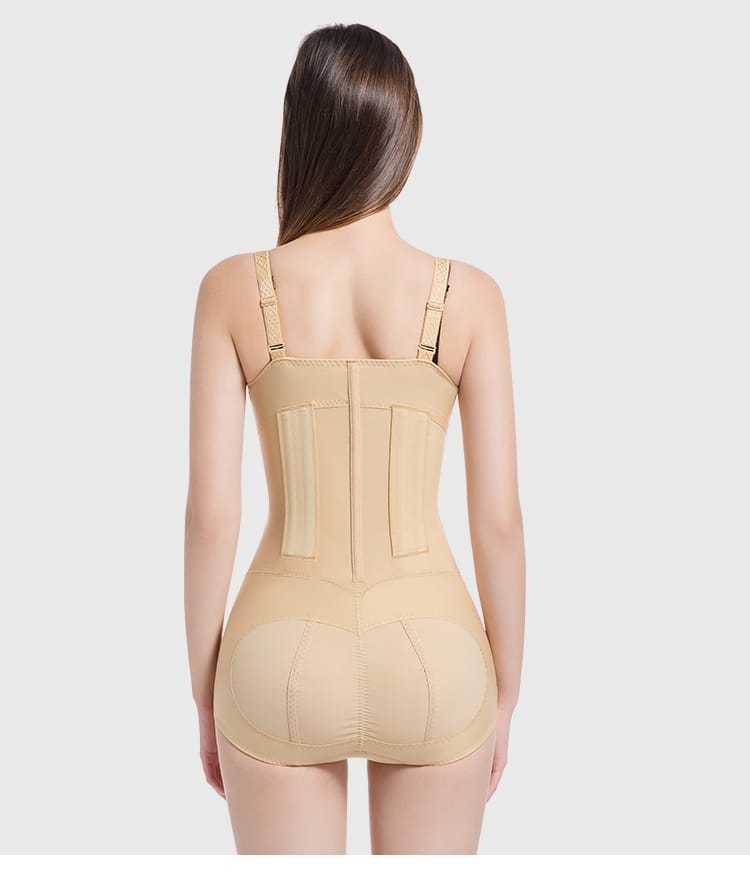
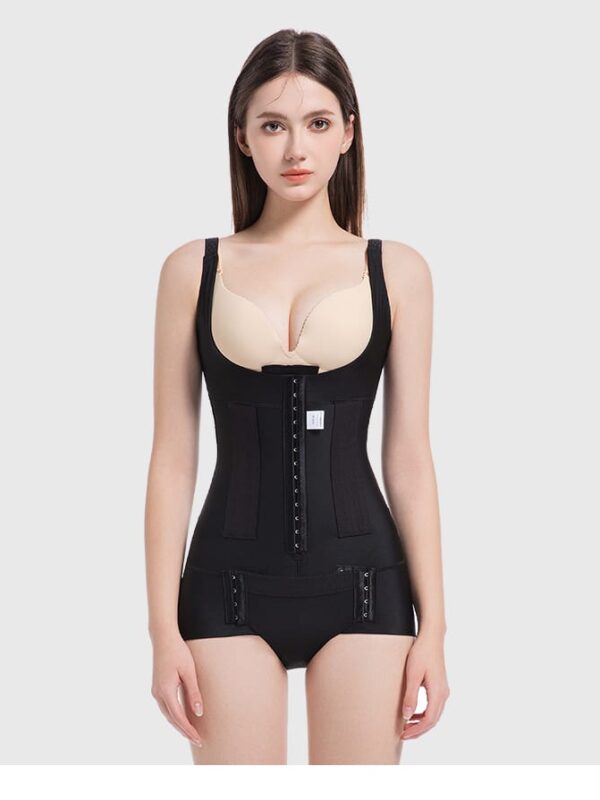
| BBL-oriented connected coverage | Front-hook recovery bodysuit | 8767 |
Compare the six coverage formats
These examples organize construction choices; they do not assign a garment to a procedure or patient. Confirm the exact design and current product information with the treating professional.
- Recovery Leggings & Pants
High-Waist Front-Zip Post-Surgery Compression Leggings – Full Length
$89.00Select options This product has multiple variants. The options may be chosen on the product page - Waist & Abdominal Support
High-Waist Post-Surgery Abdominal Compression Belt
$79.00Select options This product has multiple variants. The options may be chosen on the product page - Recovery Bras & Vests
Open-Bust Front-Hook Post-Surgery Compression Bra Vest
$79.00Select options This product has multiple variants. The options may be chosen on the product page - Fajas & Recovery Bodysuits
Post-Lipo Open-Bust Full-Body Compression Garment with Hook Closure
$79.00Select options This product has multiple variants. The options may be chosen on the product page - Recovery Sets
Post-Surgery Arm & Abdominal Compression Garment Set
$69.00Select options This product has multiple variants. The options may be chosen on the product page - Fajas & Recovery Bodysuits
Sleeveless Front-Hook Recovery Bodysuit – Stage 2 BBL-Safe
$89.00Select options This product has multiple variants. The options may be chosen on the product page
Continue your recovery garment decision
Once you know the coverage and construction your provider wants, compare the garment family that matches that plan. Then confirm current measurements and unfamiliar recovery terminology before ordering.
- Recovery Fajas & Bodysuits — compare connected torso and lower-body coverage.
- Recovery Leggings & Pants — compare lower-body, leg-length and closure formats; for a full-length front-hook example, see High-Waist Post-Surgery Compression Leggings.
- Post-Surgical Bras — compare breast and upper-torso recovery-support designs.
- Qinelle Size Guide — use current measurements and the exact product chart.
- Recovery Glossary — clarify terms such as faja, Stage 1 and Stage 2 before comparing products.
Explore the Post-Surgery Compression Garments guide and Recovery Support collection.
Sources and review notes
- American Society of Plastic Surgeons: The Importance of Compression After Plastic Surgery — provider-directed use and changing fit.
- ASPS: Liposuction Recovery — postoperative garment context.
- ASPS: Recovering from a Brazilian Butt Lift — procedure-specific recovery and pressure questions.
- Plastic and Reconstructive Surgery Global Open: Postoperative Compression Garments Review — evidence strengths and limitations.
- NHS: Caesarean Section Recovery — postpartum recovery and warning signs.
Sources and product availability checked August 28, 2026. Procedure-specific use must be confirmed with the treating professional.